-
Posts
65 -
Joined
-
Last visited
-
Days Won
12
Content Type
Profiles
Forums
Raffles
Posts posted by Wendt
-
-
Updated guide with @Diogo Moder and @Noobs Own videos.
Also changed some pictures that where broken.
-
 1
1
-
 1
1
-
-
PRESETS and DPS meta (also Strategies) are outdated.
-
You the best, Tyrone!
-
 1
1
-
1
-
-
Thats its my biggest +1 still today! Thanks for the suggestion, Tyrone!
-
1
-
-
Huge Thanks to @Arcadiez for the gucci Solak image!
-
You the best!
-
 1
1
-
 1
1
-
-
Added some gucci images to it! Thanks to @Arcadiez!
-
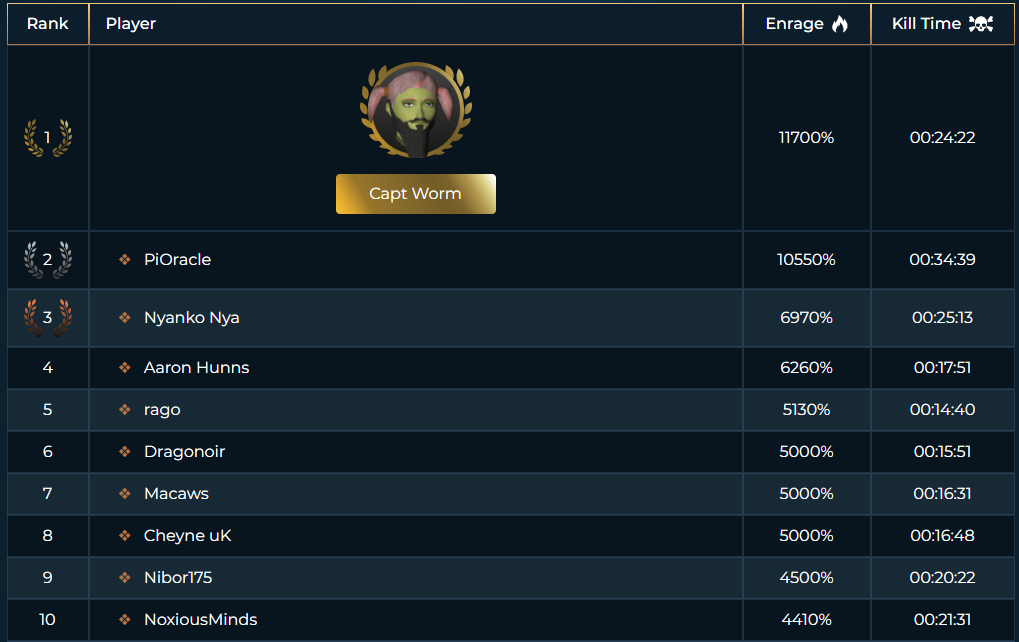
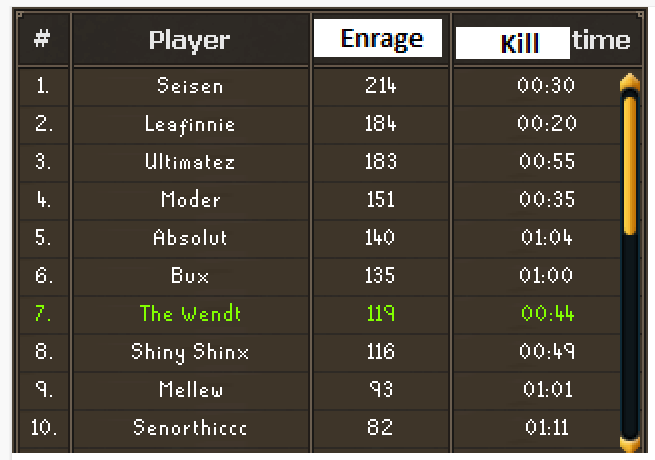
I imagine that the vh, instead of the killcount, will have the enrage. And in the time highscore, use the best time reached in the highest enrage by the player.
This is an example of how Zamorak highscores look on RS3.

Maybe something looking like this for Velheim:

-
 1
1
-
-
Hiscore's signpost could show each person's maximum enrage (telos and arch glacor), along with the time of that specific kc. In the same way that zamorak ranks work in rs3.Being the order of hiscore ranks according to the enrage - the highest enrage on top (tiebreakers according to the time in that enrage).
-
 3
3
-
-
With the new released of Zuk and (future) Arch Glacor, might be a good thing adding some things to the game, that makes gwd3 being one of the best grinds in game.
1. Pernix quiever fragments to the drop table. For making the Pernix Quiever.
2. Making possible crafting the new arrows. Ful, Wen and on the future, Bik and Deathspore.
3. Adding Mechanised chinchompa to the game, as a range AoE option.
-
 7
7
-
 1
1
-
 1
1
-
 1
1
-
-

TzKal-Zuk is the general of the Ful Front of the Elder God Wars. This encounter is the third version of the Fight Caves/Fight Kiln, in that you fight waves of enemies before taking on the main boss.
This guide will covered either normal mode and hard mode. The only difference between both are that hard mode all mobs and bosses have the double of HP.
 Spoiler
⬥
 Obsidian blade - Part of the t95 2H weapon (hardmode flawless only)
⬥ Magma core - Part of the t95 2H weapon (hardmode flawless only)
⬥ Ancient hilt - Part of the t95 2H weapon (hardmode flawless only)
⬥ Igneous stone - Used to upgrade kiln capes to Igneous capes (flawless normal mode or hard mode)
⬥ Scripture of Ful (pocket slot) (flawless normal mode or flawless hard mode)
⬥ Tzkal-Zuk's armour piece (Pet)
 Spoiler
This encounter has 17 waves of enemies, and then the final boss, TzKal-Zuk. Normal mode has checkpoints after waves 5, 10, 15, and 17.
Hard mode has one checkpoint after wave 17.
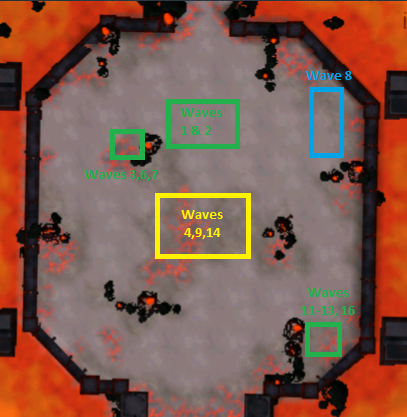
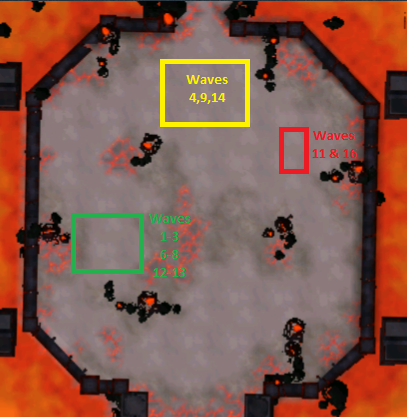
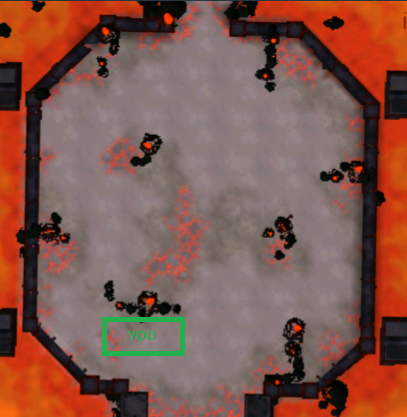
The arena has some ledges in it that can be used to lure/safespot various mobs. You can choose and develop different ways of luring mobs.
Gonna show below some players preferences for it. Feel free to blend and choose whatever feels better to you.
My personal suggestion for safe spots:

@Diogo suggetion for speed kills:

@Seisen suggestion for all waves safespot:

Some videos for examples by @Diogo Moder and @Noobs Own
 Spoiler
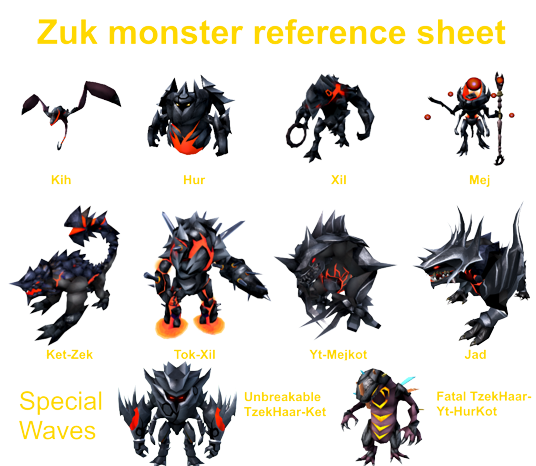
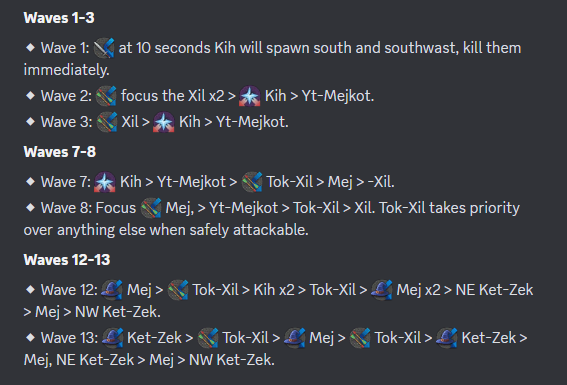
Mobs from Waves:

Normal Waves (1-3, 7-8, 12-13) and Igneous Waves (4, 9, 14)
NOTE: TzekHaar-Kih takes priority focus over everything.
Igneous Waves 4, 9, 14
⬥ 3 Large Igneous variants of mobs will spawn along with many normal versions of that mob.
• Igneous TzekHaar-Hur
⬩ Weaken by stunning, then kill normally.
• Igneous TzekHaar-Xil
⬩ Weaken by stunning, then kill normally.
• Igneous TzekHaar-Mej
⬩ Weaken by stunning, then kill normally.
⬩ You can stun using bolas /
  sticky bombs /
  Ice barrage /
  entangle.
• Only the 3 Igneous variants need to be killed. The rest of the mobs can be ignored.
⬩ After killing the last Igneous mob of the wave, an extra action button will appear on your screen. Click that and attack TzKal-Zuk until you deal 5k (normal mode) or 10k (hard mode) damage to him.
Note: If you fail to deal the damage to TzKal-Zuk, the phase repeats itself and you must do the remainder of the hp to trigger the next phase.Challenge Waves (5, 10, 15)
These waves are challenges for the player. They must be completed successfully to achieve a flawless run.Wave 5
⬥ You must kill the 5 Volatile TzekHaar-Hur before the bar fills above their head.
• Failure to do so will result in large typeless hits for each one left alive.Wave 10
⬥ You must kill the Unbreakable TzekHaar-Ket before the bar fills above its head.
• Only hits that deal 300 or more damage will hurt this mob.Wave 15
⬥ You must survive several attacks from three Fatal TzekHaar-Yt-Hurkots. Each one attacks with a different combat style, and for a flawless run you must not take damage.
Attacks order:Jad Waves (6, 11, 16)
Wave 6
⬥ This is the first wave with a Jad. Kill it as soon as possible then focus on the other mobs.Waves 11 and 16
⬥ Wave 11 has 2 Jads and various mobs.
⬥ Wave 16 has 3 Jads but no other mobs.
TzekHaar-Aken:Wave 17
⬥ This is the last enemy before fighting TzKal-Zuk. He has a lot of tentacles (Mage and Ranged) which will constantly attack dealing small damage.
• You do not need to kill any tentacles to finish the phase. Just the head needs to die.
• He has a mechanic that shoots a blob to your location.
⬩ When his head is exposed, he only fires 1 blob at a time.
⬩ When he submerges, he fires blobs that expand into a 5x5 X shape at your players location. These can be dodge by moving out of the way.
 Spoiler
He primarily attacks with melee in melee distance, otherwise with magic.
Mechanics:
Zuk performs a mechanic after every 3 auto attacks. The mechanics appear in order as follows, and will repeat once all mechanics have happened.
Note: Zuk will skip the first 3 auto attacks and go into the Geothermal Burn mechanic as soon as the encounter starts. In addition, when Zuk hits 10k lifepoints, he will restart his attack rotation, starting with the Geothermal Burn.Geothermal Burn:
⬥ Zuk shouts You will break beneath me! and applies a magic bleed that lasts for 20 seconds.
Sear:
⬥ Zuk shouts Sear! or Suffer! and hits you with a melee hit and 2 magic hits, and lowers your constitution level.
• You need to travel 15 total tiles to stop the hp drain, and drink super restores to clear the debuff.
Quake:
⬥ Zuk shouts Tremble before me! or Fall before my might! and causes the floor to crack in small areas around him that deal a lot of damage and apply an escalating magic bleed if stood in.
Empowered Magic:
⬥ Zuk shouts Die! Begone! or Ful's power flows through me! and shoots a projectile at you that deals high soft-typeless damage.
• Switch to divine to reduce damage.Igneous Rain (Pizza Phase):
⬥ Zuk shouts Flames consume you! or Burn! and jump to the middle of the room, becoming immune to attacks, and covering all but one section of the arena with fire that ramps up damage the longer you stand in it.
• Get to the safe part of the arena, where an Igneous mob will be waiting for you to kill.
• Kill these the same way as in waves 4, 9, and 14. Use the extra action button to interrupt the mechanic.If you fail to interrupt it, it will instakill you.
 Spoiler
OBS: These are not minimum requirements. These are my recommendations for getting good kc’s. That said, let's take a look at what we can use.
PS: PRESETS ARE OUTDATED
Mage/Range Brid:
Mage for waves
Range for challenges/Haar Aken/Zuk.
Aura: Vampyrism or
  Dark Magic
Summon: Unicorn or
  Steel titan
Rune pouch: Runes for Blood and
  Ice barrage
EoF: ECB /
ECB /  Decimation


Melee/Range Brid:Melee for waves and challenges.
Range for Jads/Haar Aken/Zuk.
Aura: Vampyrism
Summon: Unicorn
EoF: DDS /
DDS /  ECB /
ECB /  Decimation


Mage/Range Brid with Refined Sliske Armor (allows bring more food):
Mage for waves
Range for challenges/Haar Aken/Zuk.
Aura: Vampyrism or
  Dark Magic
Summon: Unicorn or
  Steel titan
Rune pouch: Runes for Blood and
  Ice barrage
EoF: ECB /
ECB /  Decimation


Obs:
Can also use
 Pack Yak if you learning and feels it's necessary.
 TokKul-Zo ring buff works only in mobs, it doesn't work at Zuk. For Zuk use the
  Asylum surgeon's ring.
 Illuminated Book of Chaos it's the better option for waves, but the
  Grimoire can be used to Haar Aken and Zuk.
Hope this guide helps everyone to get their Zuk kc's. Huge thanks to @Diogo, @Seisen for helping me with the strategies.
Huge thanks also to @Arcadiez who made the really cool images in the guide!
-
 3
3
-
 4
4
-
 2
2
-
 1
1
-
-
DPS meta (and so Strategies) are outdated.
-
Added a new strategy for duos.
-
 1
1
-
-
Thanks guys for opening the space for the community to dialogue!
-
 1
1
-
-
Vis wax is hugh! Thanks thanks, Sand!
-

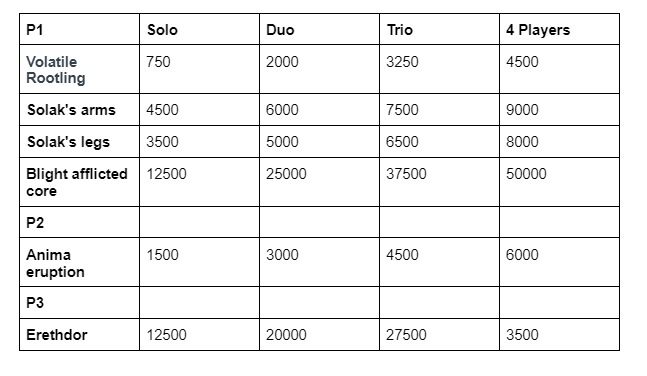
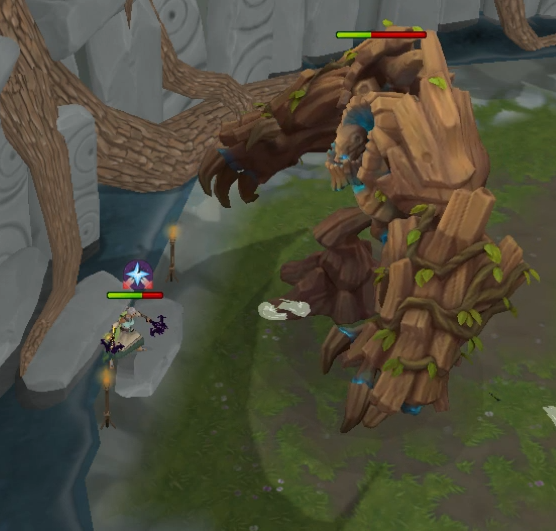
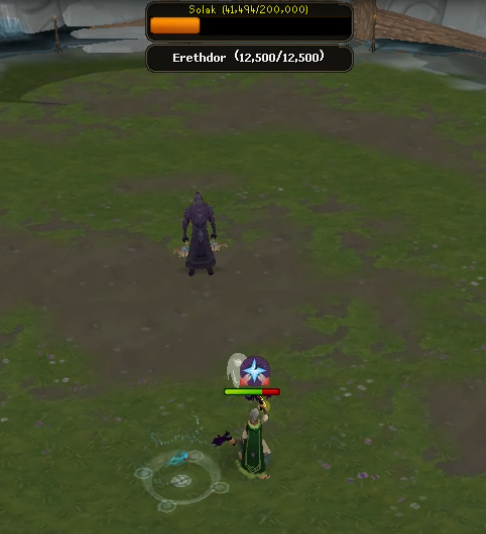
Solak is an anima guardian, enslaved by the dark elf Erethdor to siphon energy from the Lost Grove. The player is tasked with freeing Solak from Erethdor's grasp, aided by his sister, Merethiel, who provides aid during the fight. Solak is a high-level boss, boasting a variety of dangerous mechanics, and can be found in The Lost Grove. The encounter scales according to the number of players, ranging from 1-7 players. The mechanics and life point thresholds change across team size, with the loot drop rates remaining constant.
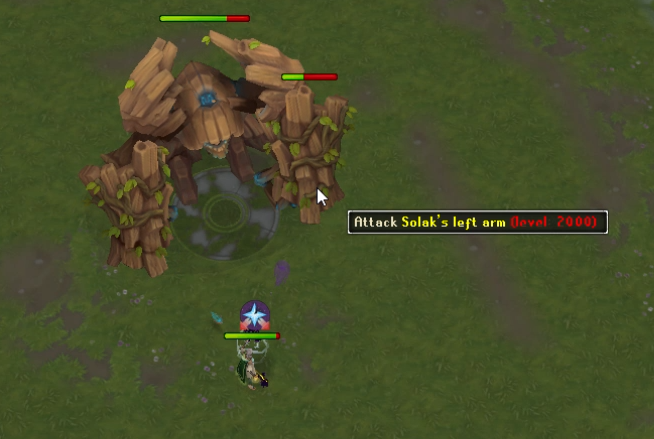
Solak is a mechanically heavy boss, broken up over the 4 phases, with various targets. Some of these mechanics are optional, such as killing Erethdor and Realm. Solak attacks the main target (Base) with Melee auto-attacks, and secondary targets (DPS) with Ranged auto-attacks.
You can receive as a drop for defeating Solak the tier 92 Range weapons Blightbound crossbows, the pocket slot Erethdor’s Grimoire, as also Cinderbane Gloves and the Merethiel Stave override. As pets you can receive the Purple Mushroom that unlocks the Blightbound Lesher companion pet, and Imbued bark shard that unlocks Solly pet. Perdita pet is obtained by defeating Solak 1000 times.
PHASE HEALTH
Spoiler
MECHANICS HEALTH
Spoiler
PRESETS
SpoilerOBS: These are not minimum requirements. These are my recommendations for getting good kc’s. You may still be able to do duo/trio with inferior gear. That said, let's take a look at what we can use.
PS: PRESETS ARE OUTDATED
Aura / Summon
 Dark Magic /
  Reckless aura - DM aura helps on corruption draining during P2, so it's really useful, but Reckless still is bis aura for damage.
  Steel titan for summon. But, if you are learning, you can also use
  Unicorn or
  Pack yak if you feel it's necessary.
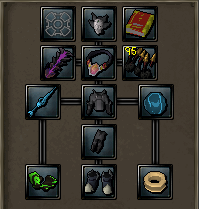
Worn Equipment Augmented ascension crossbow and
  Augmented kalphite repriser /
  Augmented Blightbound crossbow and
  Augmented off-hand blighbound crossbow
 Elite sirenic mask,
  Augmented elite sirenic hauberk,
  Augmented elite sirenic chaps
 Flarefrost boots
 Cinderbane gloves
 TokHaar-Kal-Xil /
  Max cape /
  Comp cape
 Illuminated book of law /
  Erethdor’s grimoire
 Ring of death (i)
 Essence of finality amulet with
  Eldritch crossbow special attack stored inside
 Ruby bakriminel bolts (e) /
  Onyx bakriminel bolts (e)
See ;;topic 3435 for ancient invention perks.


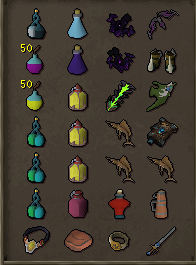
Inventory suggestion
 Elder overload salve potion /
  Elder overload and
  Super prayer renewal potion
 Adrenaline potion
 Super restore flask /
  Spiritual prayer potion
 Weapon poison+++
 Vulnerability bomb
  Augmented enhanced Excalibur
  Ancient elven ritual shard
 Bolas /
  Sticky bombs (for stuns during p3)
 Augmented Seren godbow
 Asylum surgeon’s ring (i)
 Essence of finality amulet with
  Magic shortbow /
  Dark bow /
  Decimation special attack stored inside
 Augmented divine spirit shield
Any RoTS or
  Dungeon Shield for voke if you base (DPS can replace it with one extra Adrenaline potion)
For food you can bring Super Saradomin brew flasks /
  Sailfish /
  Blue blubber jellyfish
Might be useful bring too:
 Heated tea flask
 Powerburst of vitality
  Powerburst of feats
 Hydrix bakriminel bolts (e) /
  Ascendri bolts (e)
 Large rune pouch containing
  Death,
  Earth and
  Astral runes for
  Vengeance
If using
 off-hand blightbound crossbow bring
  Augmented kalphite repriser (as a switch for stuns during P3)
You can also bring Black Stone Arrows for SGB switch


MECHANICS
Phase One
Spoiler⬥ P1 Notes
- The rotation will restart from green pads until the core is dead.
- When Solak reaches his hp cap for the phase, he will phase into Arms instead of his next special attack.
- After the Blight Bomb 1, Solak increases his attack speed from 5 ticks to 4 ticks, for 10 auto-attacks.
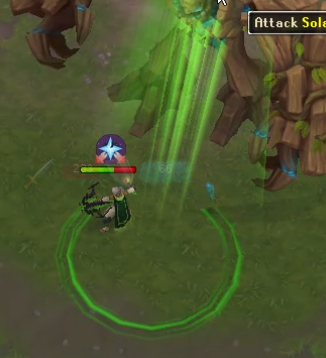
⬥ Pads
- One green pad for each player in the battle will spawn at a random location.
- Run to the center of the pad.
- Players will be dealt 500-600 blight damage per pad missed.

⬥ Personal Blight Bomb
- After pads, all players will have a bar above their head.
- When filled entirely, an explosion will deal 300-400 damage.
- Swap Divine as the bar fills entirely to decrease the damage.

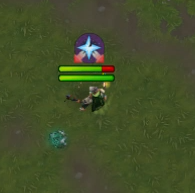
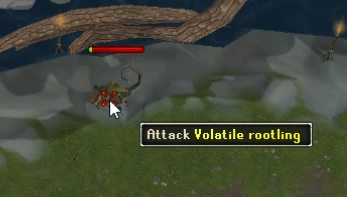
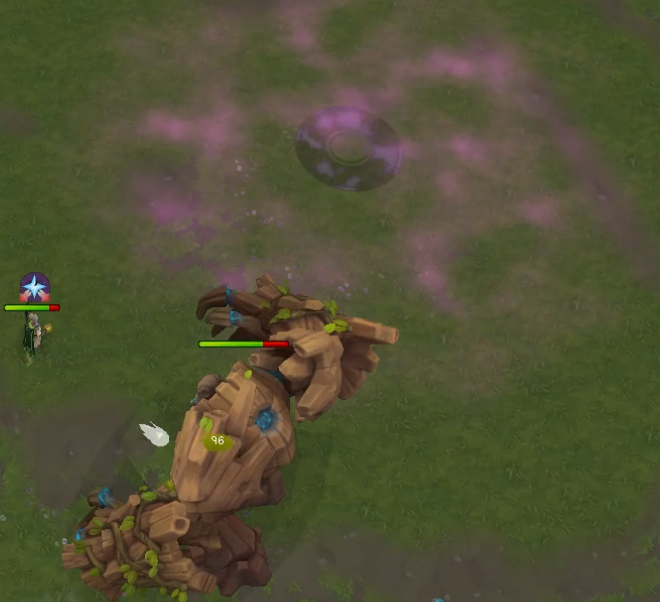
⬥ Volatile Rootlings
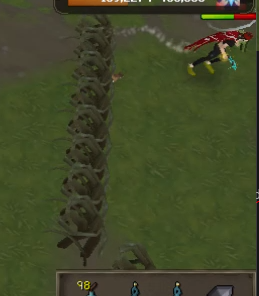
- 8 Volatile Rootlings roots appear around the edges of the arena.
- If not killed, they will become Blightbound Lashers.

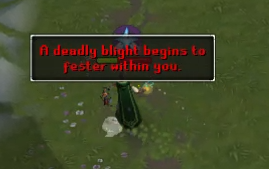
⬥ Personal Roots
- Players will be given a text box informing that they have Blight Roots.
- There will be yellow arrows at the players' feet and on the minimap indicating where the roots will be coming from.
- The player must move 1 or more tiles away from their pinpointed location and run away from the roots to avoid damage and a stun.
- Use Divine or Repriser to ensure you won't be stunned.

⬥ AoE Blight Bomb
- Non-base players will receive a bar above their head (and throughout Phase 3, as well).
- When filled entirely, an explosion will deal 300-400 damage (AoE).
- Swap Divine as the bar fills entirely to decrease the damage.
- Solak's auto attacks will speed up after these bombs.

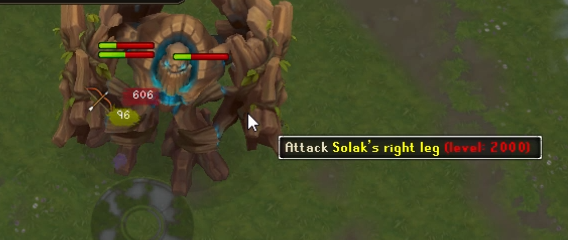
⬥ Arms and Legs
- Solak will root his arms to the center of the arena. Arms must be killed before the second bar loads entirely.
- After both arms die, Solak will stand up, exposing his legs. Legs must be killed before the second bar loads entirely.
- Being too slow on either arms or legs means that Solak will stand up and spawn Blightbound Lashers.


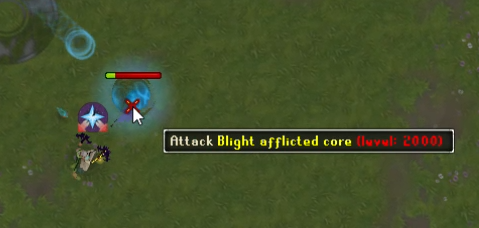
⬥ Core
- After both the arms and legs have been killed, Solak will expose his core.
- The core must be killed before the second bar loads entirely.
- If the core is not finished, P1 mechanics will repeat (If Solak's hp is capped, from Arms and Legs. If Solak's hp is not capped, will repeat all P1 mechanics still hp is capped).

Once the core is dead, Phase 1 ends and Phase 2 begins.
⬥ Skips of P1
- AoE Blight Bomb and Personal Roots can be skip if Solak reaches his P1 HP cap, this way he will phase into arms and legs.
- 1-cycle core (1cc) - Killing Solak's Core in one rotation, skipping the repeat P1 rotation.
Phase Two
Spoiler⬥ P2 Notes
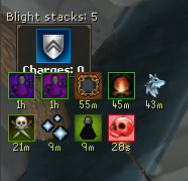
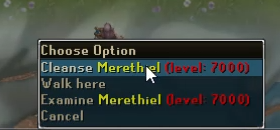
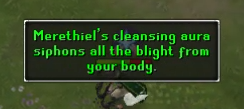
- Upon killing the Blighted Core, P2 starts, and all players are granted 5 blight stacks. From this point onwards, Merethiel can be interacted with to clear blight stacks, with a 25 second cooldown.
- Each stack increase Solak's damage during P2 and P3.
- The secondary mechanic, Corruption, is required to reach 0% to begin phase 3.

⬥ Corruption
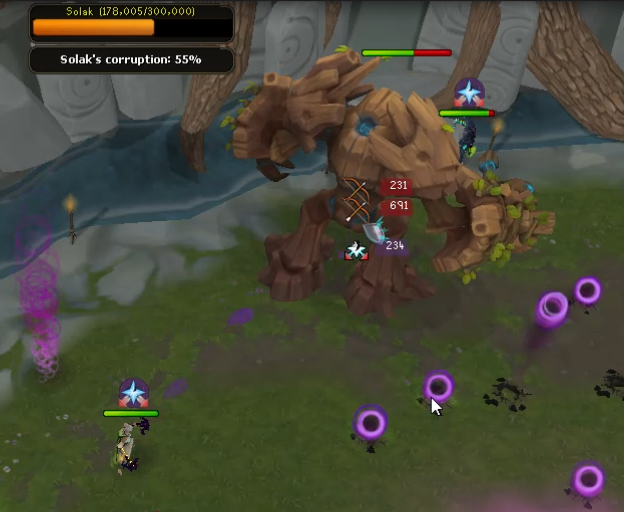
- Corruption is the overarching mechanic of P2, displayed as a secondary bar underneath Solak's hp bar. This bar must be completely drained in order to phase into P3, and is drained by a variety of factors.
- The first factor is Solak's hp, draining hp directly drains the Corruption %. 1k hp = 1% corruption.
- However, draining his hp to hit the hp cap in solo or duo will not lead to him phasing until Arm Climb. He must be damaged through the use of the ECB special attack in order to drain the bar enough, as the Split Soul special attack drains the corruption % directly.
- The Corruption bar is also drained via the mechanics and successfully climbing the arm drains 20% Corruption.

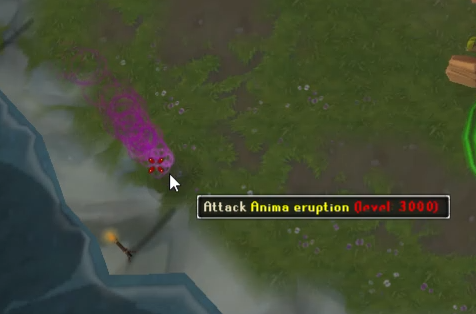
⬥ Anima Eruptions
- At the start of Phase 2, an eruption will spawn in each corner of the arena.
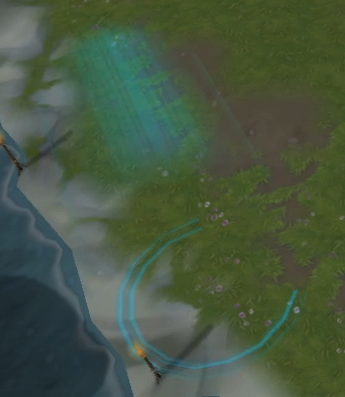
- When killed, these eruptions will spawn a blue circle that will teleport everyone within up to the Anima Storm after the eruption dies.


⬥ Cleanse/Blight Stacks
- In Phases 2 and 3, Merethiel can be clicked to activate a green circle on the ground at the south.
- Blight Stacks appear on the top of players' buff bar.
- It will remove all blight stacks from players standing within it.
- Players will do 100 less damage per click to the Anima Storm per stack, and receive 1% more damage.


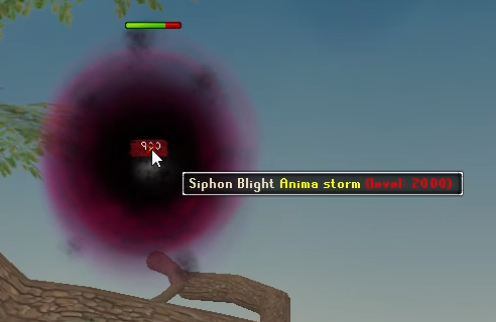
⬥ Anima Storm
- Persists from the beginning of Phase 2 until it is killed.
- It will drop bombs hitting all players for 200 damage and will add a Blight Stack to the player's debuffs until it is killed.
- It is destroyed by teleporting via the eruptions and spam clicking the storm in the sky.
- As the storm "rains" down onto the arena, a puddle of blight rain will begin to form in the center.
- Stay away from the puddle as it hits for almost 200 damage per tick and will add a Blight Stack for each hit.


⬥ Anima bombs
- Anima bombs will spawn all around the arena.
- Spores will rise into the air, fall back to the ground, and explode.
- The longer the mechanic has progressed, the more damage they will deal.
- The "safest" place to stand is directly north, between the two northernmost torches. This does not guarantee safety from the bombs, so you will have to make sure to keep an eye out.
- The DPS should position itself behind Solak, to avoid ranged autos.


⬥ Arm Climb
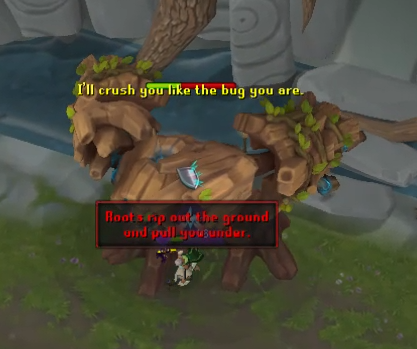
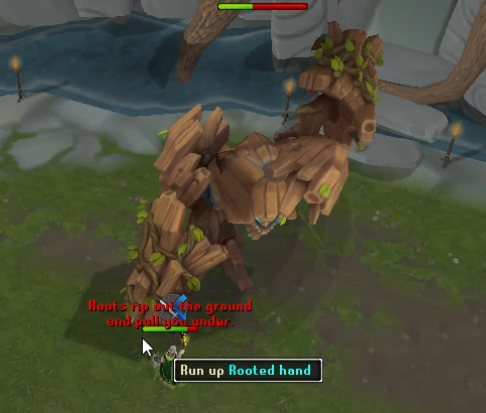
- Solak will pull one player under him (Solak will yell "I'll crush you like the bug you are", picking a random player, including the base tank).
- Divine or Repriser to ensure you won't be stunned and move away (Failure to do so will result in being insta-killed).
- After Solak slams his arm, a player should click the arm to climb up.
- This will deal a deadly blow to Solak.
- After the climb, Solak will hit the climber with a massive melee hit.
- Divine and Protect Melle to decrease the damage.


⬥ Blight Tornado
- This mechanic in particular only happens if your DPS is bad or you miss Arm Climb, in most kc's it will skip.
- Solak will be engulfed in a purple blight tornado and spin rapidly.
- The only thing the player can do is switch to Divine and eat a lot.
P2 ends when you hit the hp cap and corruption reaches zero.
Phase Three
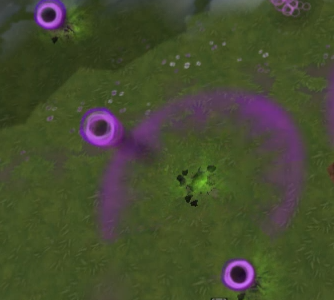
Spoiler⬥ Charge Pads
- At the start of Phase 3, 8 pads will spawn around the arena.
- As Solak stands on this pad, it will charge up (indicated by a blue ring).
- When fully charged (turns purple), Solak will stop attacking and begin to shake rapidly.
- Random bombs can fall onto pads throughout the phase.
- Players may use their extra action button (top of the buff bar) to access the Realm.
- If all 8 pads are fully charged, P3 will end. This is not commonly done; instead, it is recommended to enter the realm and kill Erethdor.


⬥ The Realm
- Accessed on Phases 3 and 4 by using the extra action button on top of the buff bar.
- In Phase 3, the Realm is used to kill Erethdor.
- The phase will end when Erethdor is killed (DON'T kill Erethdor before Solak's hp arrive at the P3 cap).


⬥ AoE Blight Bomb
- AoE blight bombs also occur in Phase 3, and are dealt with the same as in Phase 1.
- Trio or larger teams also cause roots to form a line between targeted players.
- The player must move 1 or more tiles away from their pinpointed location to avoid damage and a stun.
- Use Divine or Repriser to ensure you won't be stunned.


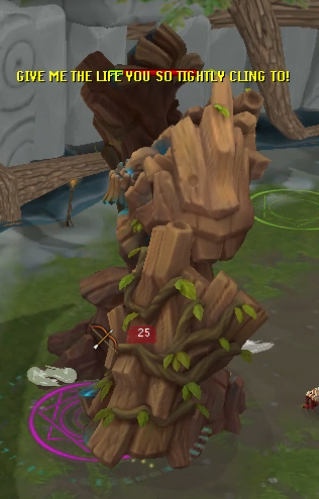
⬥ Stun- Throughout the phase, Solak will stun all players in the regular arena (Solak intermittently shouts "Give me the life you so tightly cling to!", raising his hand and charging it with blight energy before slamming it into the ground).
- If he is not stunned back, players will be hit with a bleed that escalates in damage over time (basically insta killing).
- Bolas, Ice Barrage and Sticky Bombs will work for this mechanic.
- At large teams Solak must be stunned multiples times (The current players - 2).
- Stun rotation: 6 autos > Stun > 5 autos > stun > repeat


⬥ Solak HP cap:
- Only phase's Solak after hitting his hp cap.
- 20k Solo / 30k Duo / 40k Trio / etc..
P3 ends when you kill Erethdor or charge all Pads.
Phase Four
Spoiler- The general approach to succeeding on P4 is to ignore the Realm, and instead finish Solak before his mind is consumed (insta kill). That's said, DO THE BEST DPS YOU CAN!

⬥ Realm Manifestations
Entering the Realm on P4 should not be done under normal circumstances, instead, prefer to No-Realm and just dps. But, let's see how it works:
- Manifestations will spawn inside of the Realm and attempt to consume Solak's mind. If the mind is consumed, all players will be insta-killed.
- The HP of Solak's mind is the bottom of the two displayed on-screen.
- The rate at which manifestations consume the mind increases the longer they live.
- More manifestations will spawn the faster Solak's hp bar is depleted.
- Manifestations can be tanked by a player through entering the Realm.
- While in the Realm, players can sacrifice their own hp to heal Solak's mind.
OVERVIEW & STRATEGIES
PS: STATEGIES OUTDATED
This is an overview and some strategies for the main mechanics during the fight against Solak. Still, I advise you to check previous text to understand how all the mechanics work.
SpoilerBasic method - works either for solos or duo+ teams.
P1:
- Run to the green pad > Divine for bombs
- Kill Volatile Rootlings (DPS Roll - Base should cap solak’s hp)
- Run from Personal Roots > Divine or Repriser to avoid stun
- Non-base players gonna get 2 AoE Blight Bomb (2 times) > Divine
- Kill Arms and Legs
- Kill Core
- If core doesn't die but Solak's hp is cap > Repeat from arms and legs;
- If Solaks hp not cap > Repeat from the beginning still hp get capped.
Once the core is dead, Phase 1 ends and Phase 2 begins.
⬥ General Approach to DPS Core:
ECB EoF Spec > Secondary EoF Spec > Adrenaline Potion > Secondary EoF SpecNote: Personal Roots and AoE Blight Bomb can be skip if Solak reaches his P1 hp cap, this way he will phase into Arms and Legs.
P2:- Run south > Click on Merethiel > Run into the green circle for cleaning stacks
- Kill one Anima Eruption > Run into the blue circle > Spam click the Anima Storm
- Run north to safe spot
- Avoid Anima Bombs
- Climb on Solak Arm > Divine + Protect Melle (DPS Roll)
- If dps is bad, you get Tornado > Divine and eat a lot (cleanse ASAP)
P2 ends when you hit the hp cap and corruption reaches zero.
Note: Arm climb can be skipped if your DPS is good and you manage to drain all corruption with DM aura and ECB spec.
P3:
P3 Stun rotation: 6 autos > Stun > 5 autos > Stun > Repeat- Charge the first Pad > DPS Solak
- Non-base players gonna get AoE Bomb > Divine
- After the first 6 autos > Stun Solak
- Charge the second Pad > Go to Mind Realm (Action Button on top of the buff bar) > Attack Erethdor (don't kill him yet)
- After 5 autos from the previous stun > Stun Solak (see stun rotation > cleanse if needed)
- Cap Solak hp (20k solo / 30k duo / 40k trio / etc)
- Charge the third Pad > Go to Mind Realm and kill Erethdor
P3 ends when you kill Erethdor or charge all Pads.
Notes: You can click Merentiel anytime to cleanse (I advise to cleanse after the first mind realm if you have more than 10 stacks and feel it necessary).
Trio or larger teams AoE Bomb also cause roots to form a line between targeted players. Move 1 or more tiles away to avoid damage and a stun > Divine or Repriser.
P4:Kill or die. Do the best DPS you can! Kill Solak before conscience reaches zero (insta kill).
⬥ General approach to DPS P4:
Vulnerability bomb > ECB EoF Spec > Secondary EoF Spec > Adrenaline Potion > Secondary Eof Spec > ECB EoF Spec (if still have special attack bar)
You can also use a Steel Titan with Powerburst of Feats for extra DPS.
Method for Duos sub5:30:
For this method you're gonna need bis gear and perks. You should run full kcs with Hydrix Bakriminel Bolts (e), and run either EcB or/and Decimation 100% of the time.
P1:
Vulnerability bomb > ECB EoF Spec > Decimation EoF Spec > Adrenaline Potion
Powerburst of Vitality the green pad > Divine + Vengeance for bombs
Vulnerability bomb > ECB EoF Spec > Decimation EoF Spec > Adrenaline Potion
Cap Solak HP > DPS do 4 Roots / Base do 4 rootsShould skip Personal Roots and AoE Blight Bombs
Kill Arms and Legs
Kill Core⬥ General Approach to DPS Core:
Vulnerability bomb > ECB EoF Spec > Decimation EoF Spec > Adrenaline PotionP2:
Run south > Click on Merethiel > Run into the green circle for cleaning stacks
Kill (only) ONE Anima Eruption > Run into the blue circle > Spam click the Anima Storm
Run near the Puddle southeast corner and DPS.Vulnerability bomb > ECB EoF Spec > Decimation EoF Spec > Adrenaline Potion > ECB EoF Spec during all phase > Adrenaline Potion
Should skip arm climb and tornado.
P3:
P3 Stun rotation: 6 autos > Stun > 5 autos > Stun > RepeatCharge the first Pad > DPS Solak
Vulnerability bomb > ECB EoF Spec > Decimation EoF Spec > Adrenaline Potion > keep running EcB EoF Spec all phase >Adrenaline Potion
Stun Solak when needed
Get CLOSE to HP Cap
Charge the second Pad > Go to Mind Realm and kill Erethdor (Vulnerability bomb > EcB EoF Spec > Powerburst of feats > SGB Last tick)
P3 ends when you kill Erethdor.P4:
⬥ General approach to DPS P4:
Vulnerability bomb > ECB EoF Spec > Decimation EoF Spec > Adrenaline Potion > Decimation Eof Spec > ECB EoF Spec (if still have special attack bar).
Would like to thank @sscent, @Diogo, @Almost Done, @Seisen and @k3ito for helping me to develop the strategies.
Hope this guide helps everyone to get their Solak kc's.
-
 6
6
-
 6
6
-
1
-
 1
1
-
ING: The Wendt
IM3: Clue Scroll Collector - Awarded to members who have completed one of Clue Scroll collection logs.

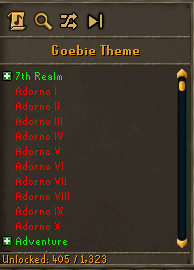
IM13: Musician - Awarded to members who have unlocked more than 300 Music Tracks.

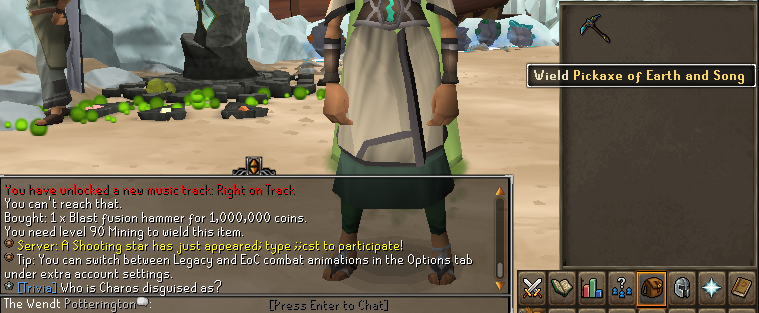
IS2: Earth and Song - Awarded to members who crafted their own Earth and Song Pickaxe.

IP7: Bounty - Awarded to members who have unlocked Tier 9+ Bounty emblem.

D2: Beta Tester - Awarded to those members who have the Beta Tester tag on the Discord Server.
D3: Verified Discord Account- Awarded to member who have connected their in-game account to the forum(Verified discord tag).

Idk if this one can be add, but...
IM16: Hazelmere's signet ring - Awarded to members who made recieved the Hazelmere's signet ring as a drop from NPC or Seren Spirit.

//Added, and congratulations - Tyrone!
-
Congratulation Brother!!!
-
 1
1
-
-
Think is a good implementation. The only thing I have my concerns about is that attack speed increase. Imo that's really not necessary, specialy as a feature of a few minutes inside a shop. The others things are really good!
Btw, Im with Tyrone on the ideia of having untradeable and tradeable versions of the tokens for differents prices, like the blueprint's in arch.
-
 1
1
-
 1
1
-
-
Out of all the guides, this is definitely the one that helped me the most so far! Thanks!
-
Thanks for the fixes, Sand!
-
Wp all! Was a really nice event!
-
First of all, I wanted to thank Tyrone for allowing us to speak in Portuguese here, and that's what I'm going to do. (I will try to use a language easy to translate by the translator)
Dentre as inúmeras coisas que posso falar como participante do BH2, a primeira que me vem à cabeça com certeza é: que evento incrível. Sinceramente, espero ansiosamente por uma nova edição!
Dito isso, não há forma de não mencionar o empenho que colocamos no evento, mas não só nós do time, mas toda comunidade brasileira. As conversas descontraídas durante horas no Discord, a intensificação das amizades, realmente é um momento divertido para se jogar. Acredito que posso dizer que foi uma forma de consolidar ainda mais a comunidade brasileira dentro do jogo. Obviamente que a corrida para terminar as logs foi extremamente cansativa e roubou algumas horas de sono, mas fico com a sensação de dever cumprido no final das contas.
Me pergunto se o evento não seria melhor otimizado caso tivesse duração de apenas um final de semana, mas há diferentes formas de pensar sobre o que funcionaria melhor, e nem sempre as coisas saem como previmos, é algo natural do ser humano. No final das contas, cada dinâmica do evento, seja de duração, seja de regras, traz diferentes benefícios e malefícios.
Uma coisa perceptível é que após o primeiro lugar ser decidido, a maior parte dos jogadores foi desistindo do evento, não sei se é apenas pelas recompensas ou por outros motivos (acredito que isso cada um deva falar por si). Mas acho que as recompensas para cada colocação são extremamente justas.
Falando um pouco do futuro, espero ansiosamente por novos eventos pvm - talvez com formatos diferentes - solo ou em grupo, com vários bosses ou apenas um, quem sabe o que pode ser explorado.
Não posso deixar de mencionar que sinto muito por toda situação e estresse que este evento acabou gerando para você, Tyrone. Imagino o quão cansativo e trabalhoso é criar um evento inteiro sozinho, e admiro todo trabalho e atenção colocada nele por você.
E mais uma vez, um grande obrigado por deixar este espaço para podermos falar em português e expressar o que sentimos. É muito gratificante o acolhimento que tens dado à comunidade brasileira. Obrigado!
-
 5
5
-
 2
2
-
-
Looking forward to everything Sand!
-
 1
1
-








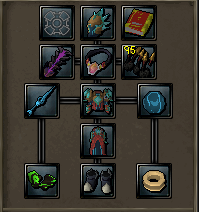
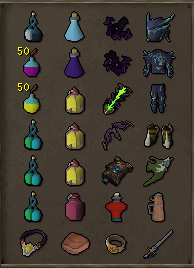
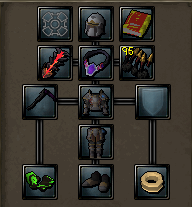
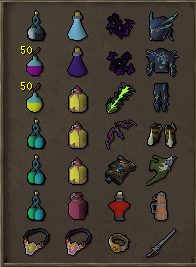


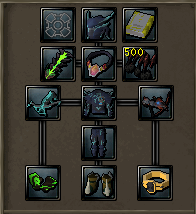
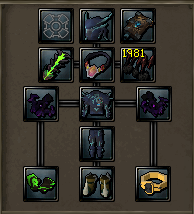
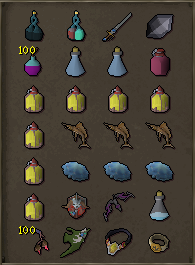
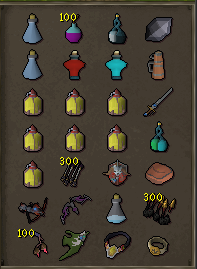
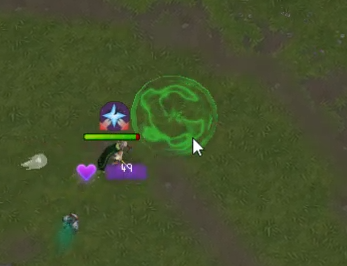

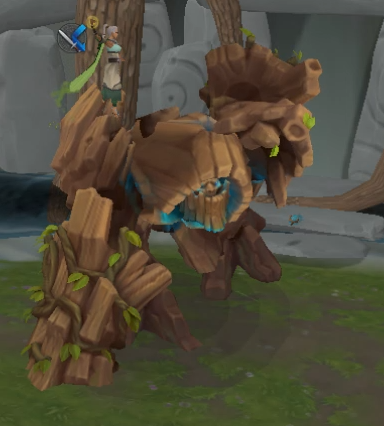
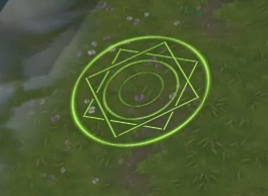
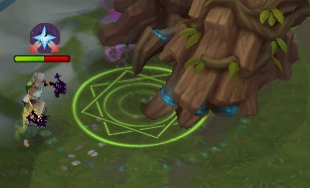
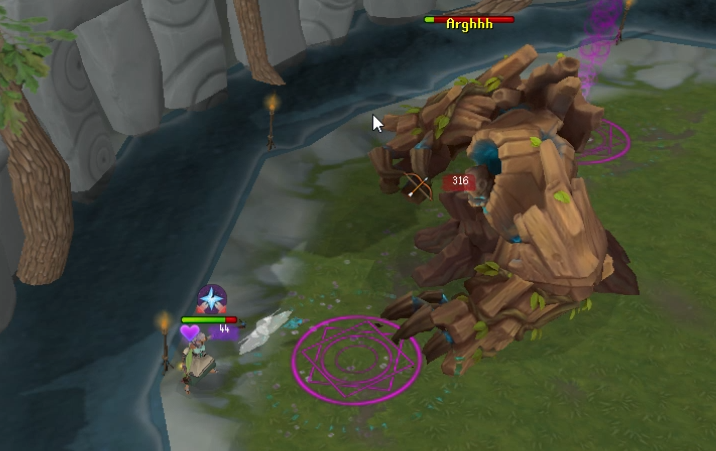




RAKSHA, the shadow colossus, guide
in YouTube
Posted
You always gamming brother! You're the best!